إنشاء واجهة تفاعلية لاختيار الدولة والمدينة يُعد من العناصر الأساسية في العديد من التطبيقات والمواقع. في هذا المقال، نستعرض 5 طرق مبتكرة لتطوير هذا النوع من المشاريع باستخدام Vite. سنتناول استخدام أدوات مختلفة مثل مكتبة Choices.js وSelect2، بالإضافة إلى كيفية تنفيذ المشروع بدون مكتبات خارجية أو باستخدام REST API وملفات JSON محلية. هذا المقال يهدف لمساعدتك على اختيار الطريقة الأنسب لاحتياجات مشروعك.

إنشاء مشروع واجهة تفاعلية لاختيار الدولة والمدينة بدون إستخدام أى مكتبة خارجية
في هذا المثال، سنتعلم كيفية إنشاء مشروع بسيط باستخدام Vite يتيح للمستخدم اختيار دولة من قائمة تتضمن أعلام الدول، وبعد اختيار الدولة يتم تفعيل قائمة أخرى لاختيار المدينة التابعة لها. يتم بناء هذا المشروع باستخدام HTML وCSS وJavaScript. وبدون إستخدام أى مكتبة خارجية.
المتطلبات الأساسية
قبل البدء، تأكد من أنك تمتلك المتطلبات التالية:
- معرفة أساسية بـ HTML وCSS وJavaScript.
- Node.js مثبت على جهازك.
- مدير الحزم npm.
1. إنشاء مشروع Vite جديد
لبدء المشروع، قم بإنشاء تطبيق Vite باستخدام الأمر التالي:
npm create vite@latest vite-country-city-app --template vanilla
cd vite-country-city-app
npm install
سيؤدي هذا إلى إنشاء مشروع جديد يحتوي على هيكل أساسي جاهز للبدء.
2. تصميم واجهة HTML الأساسية
نحتاج إلى إنشاء واجهة بسيطة تحتوي على قائمة لاختيار الدولة وقائمة أخرى لاختيار المدينة. سنقوم بتعديل ملف index.html ليبدو كالتالي:
<!DOCTYPE html>
<html lang="en">
<head>
  <meta charset="UTF-8">
  <meta name="viewport" content="width=device-width, initial-scale=1.0">
  <title>Select Country and City</title>
  <link rel="stylesheet" href="/src/style.css">
</head>
<body>
  <div id="app">
    <h1>Select Country and City</h1>

    <label for="country">Country:</label>
    <div class="custom-select" id="country-select">
      <div class="selected">Select country</div>
      <ul class="options"></ul>
    </div>

    <label for="city">City:</label>
    <select id="city" disabled>
      <option value="" disabled selected>Select City</option>
    </select>
  </div>
  <script type="module" src="/src/main.js"></script>
</body>
</html>
3. أكواد CSS الخاصة بالصفحة
في الخطوة التالية، سنقوم بتعديل ملف style.css في مجلد src الخاص بالمشروع. هذا الملف يحتوي على الكود اللازم لوضع بعض اللمسات الجمالية فى الصفحة.
:root {
  font-family: Inter, system-ui, Avenir, Helvetica, Arial, sans-serif;
  line-height: 1.5;
  font-weight: 400;

  font-synthesis: none;
  text-rendering: optimizeLegibility;
  -webkit-font-smoothing: antialiased;
  -moz-osx-font-smoothing: grayscale;
}

body {
  margin: 0;
  min-width: 320px;
  min-height: 100vh;
  text-align: center;
}

#app {
  max-width: 1280px;
  margin: 0 auto;
  padding: 2rem;
  text-align: center;
  display: flex;
  flex-direction: column;
  place-items: center;
  justify-content: center;
}

.custom-select,
select {
  position: relative;
  width: 300px;
  margin-bottom: 20px;
}

.custom-select .selected,
select {
  padding: 10px;
  cursor: pointer;
}

.custom-select .options {
  position: absolute;
  top: 100%;
  left: 0;
  width: 100%;
  background-color: #fff;
  border: 1px solid #ccc;
  max-height: 200px;
  overflow-y: auto;
  display: none;
  z-index: 1000;
}

.custom-select .options li {
  padding: 10px;
  cursor: pointer;
  display: flex;
  align-items: center;
  gap: 10px;
}

.custom-select .options li img {
  width: 20px;
  height: 15px;
}
4. كتابة الكود البرمجي لتشغيل المشروع
في الخطوة التالية، سنضيف ملف main.js في مجلد src الخاص بالمشروع. هذا الملف يحتوي على الكود اللازم لملء القوائم بالبيانات ومعالجة التفاعلات.
بيانات الدول والمدن
أولاً، سننشئ كائنًا يحتوي على بيانات الدول والمدن، بالإضافة إلى أعلام الدول:
// Sample data for countries and cities
const countryCityData = {
  EG: { name: "Egypt", flag: "eg", cities: ["Cairo", "Giza", "Alexandria"] },
  US: { name: "United States", flag: "us", cities: ["New York", "Los Angeles", "Chicago"] },
  IN: { name: "India", flag: "in", cities: ["Delhi", "Mumbai", "Bangalore"] },
  DE: { name: "Germany", flag: "de", cities: ["Berlin", "Munich", "Frankfurt"] },
};
ملء قائمة الدول
نقوم بإنشاء خيارات الدول بشكل ديناميكي داخل القائمة المخصصة باستخدام البيانات أعلاه:
// DOM Elements
const countrySelect = document.getElementById("country-select");
const selected = countrySelect.querySelector(".selected");
const options = countrySelect.querySelector(".options");
const citySelect = document.getElementById("city");

// Fill Country List
Object.entries(countryCityData).forEach(([code, { name, flag }]) => {
  const li = document.createElement("li");
  li.dataset.value = code;
  li.innerHTML = `<img src="flags/${flag}.png" /> ${name}`;
  options.appendChild(li);
});
التفاعل مع القائمة المخصصة
نضيف أحداثًا (Events) للتفاعل مع القوائم:
// Show Options when clicked on list
selected.addEventListener("click", () => {
  options.style.display = options.style.display === "block" ? "none" : "block";
});

// Update City Select Box When Select Country
options.addEventListener("click", (event) => {
  const target = event.target.closest("li");
  if (!target) return;

  const selectedCountry = target.dataset.value;
  selected.textContent = target.textContent;
  options.style.display = "none";

  // Fill Cities List
  const cities = countryCityData[selectedCountry]?.cities || [];
  citySelect.disabled = cities.length === 0;
  citySelect.innerHTML = `<option value="" disabled selected>Select City</option>`;
  cities.forEach((city) => {
    const option = document.createElement("option");
    option.value = city;
    option.textContent = city;
    citySelect.appendChild(option);
  });
});
5. تشغيل المشروع
بعد الانتهاء من كتابة الكود، يمكنك تشغيل المشروع باستخدام الأوامر التالية:
npm run dev
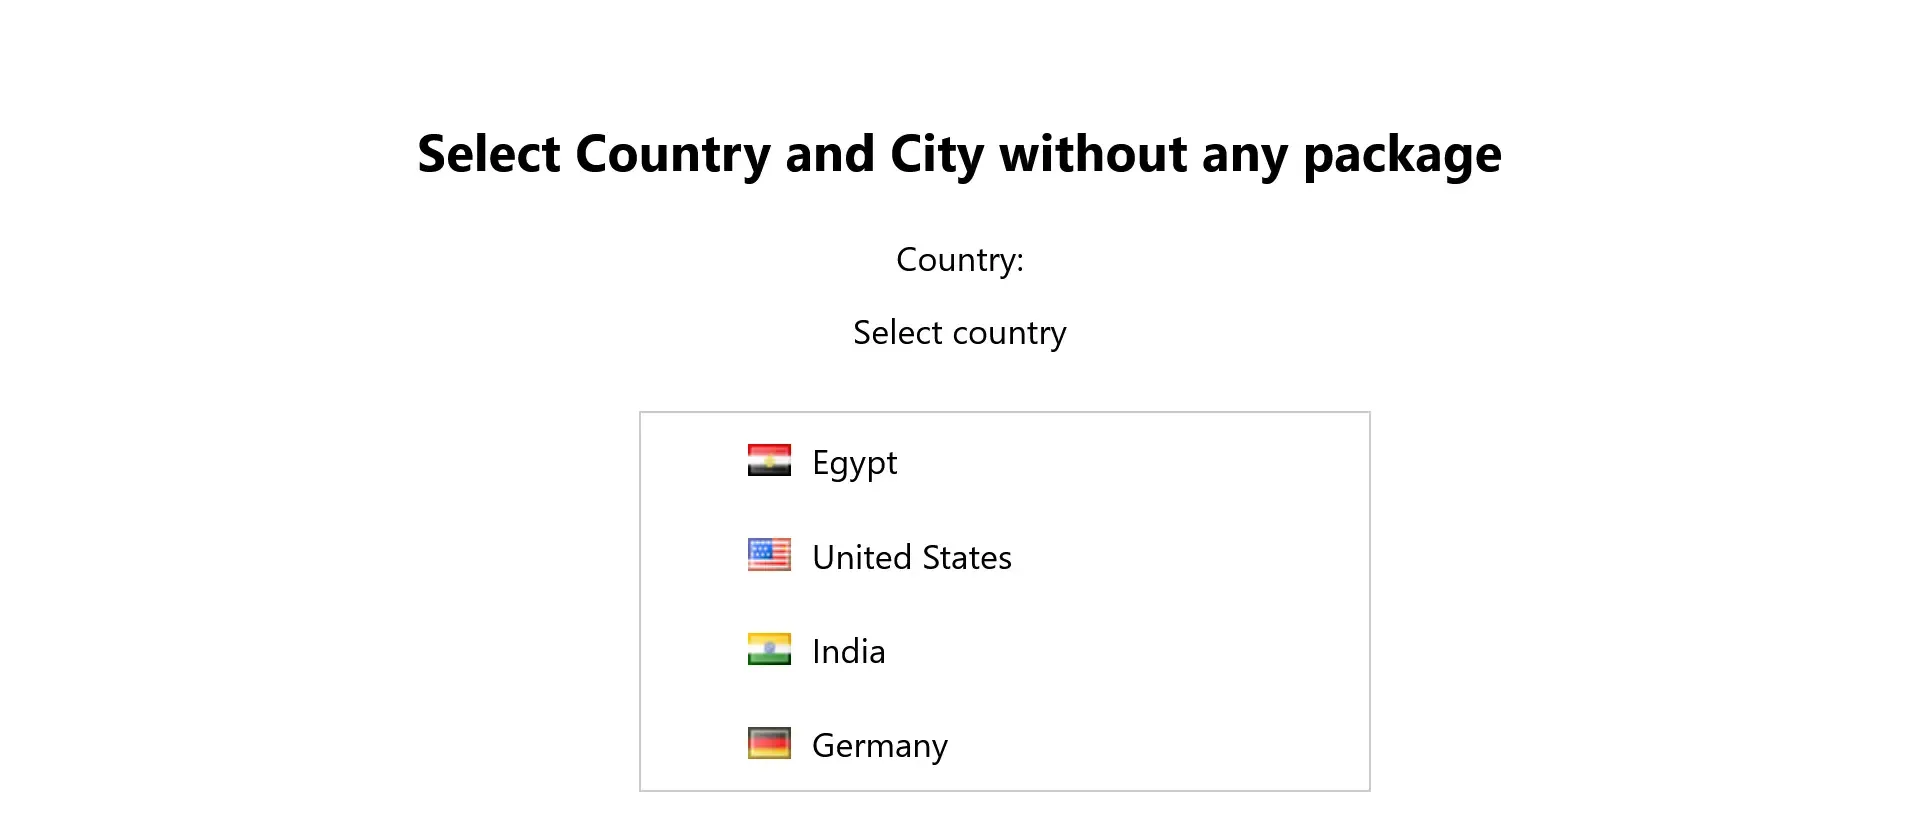
- سيتم تشغيل المشروع في المتصفح على الرابط المحلي الذي يوفره Vite.
- قم بفتح الرابط التالى
http://localhost:5173/فى المتصفح وستجد التالى.
إنشاء مشروع واجهة لاختيار الدولة والمدينة باستخدام مكتية Choices.js
في هذا المثال، سنعيد تصميم مشروع واجهة اختيار الدولة والمدينة باستخدام طريقة بديلة تعتمد على مكتبات جاهزة وتقنيات CSS وJavaScript لتقديم تجربة أكثر احترافية وسهولة في التطوير. سنستخدم مكتبة مثل Choices.js لإنشاء قوائم اختيار متقدمة.
المتطلبات الأساسية
قبل البدء، تأكد من توفر التالي:
- معرفة أساسية بـ HTML وCSS وJavaScript.
- Node.js مثبت على جهازك.
- تثبيت مكتبة Choices.js.
1. إعداد مشروع Vite
لبدء المشروع، قم بإنشاء مشروع جديد باستخدام Vite:
npm create vite@latest vite-country-city-choices --template vanilla
cd vite-country-city-alt
npm install
بعد ذلك، قم بتثبيت مكتبة Choices.js:
npm install choices.js
2. تصميم واجهة HTML الأساسية
نقوم بتحديث ملف index.html ليشمل الحقول اللازمة لاختيار الدولة والمدينة:
<!DOCTYPE html>
<html lang="en">
<head>
  <meta charset="UTF-8">
  <meta name="viewport" content="width=device-width, initial-scale=1.0">
  <title>Select Country and City</title>
  <link rel="stylesheet" href="/src/style.css" />
</head>
<body>
  <div id="app">
    <h2>Select Country and City</h2>

    <label for="country">Country:</label>
    <select id="country"></select>

    <label for="city">City:</label>
    <select id="city" disabled></select>
  </div>

  <script type="module" src="/src/main.js"></script>
</body>
</html>
3. أكواد CSS الخاصة بالصفحة
في الخطوة التالية، سنقوم بتعديل ملف style.css في مجلد src الخاص بالمشروع. هذا الملف يحتوي على الكود اللازم لوضع بعض اللمسات الجمالية فى الصفحة.
:root {
  font-family: Inter, system-ui, Avenir, Helvetica, Arial, sans-serif;
  line-height: 1.5;
  font-weight: 400;
  font-synthesis: none;
  text-rendering: optimizeLegibility;
  -webkit-font-smoothing: antialiased;
  -moz-osx-font-smoothing: grayscale;
}

body {
  margin: 0;
  min-width: 320px;
  min-height: 100vh;
  text-align: center;
}

#app {
  max-width: 1280px;
  margin: 0 auto;
  padding: 2rem;
}

.flag-icon {
  width: 20px;
  height: 15px;
  margin-right: 10px;
  vertical-align: middle;
}
4. كتابة الكود البرمجي
نقوم بكتابة الكود اللازم لتعبئة القوائم باستخدام مكتبة Choices.js. الكود يتم إضافته إلى ملف main.js في مجلد src.
تعريف بيانات الدول والمدن
//Data for countries and cities
const countryCityData = {
  EG: { name: "Egypt", flag: "eg", cities: ["Cairo", "Giza", "Alexandria"] },
  US: { name: "United States", flag: "us", cities: ["New York", "Los Angeles", "Chicago"] },
  IN: { name: "India", flag: "in", cities: ["Delhi", "Mumbai", "Bangalore"] },
  DE: { name: "Germany", flag: "de", cities: ["Berlin", "Munich", "Frankfurt"] },
};
تهيئة مكتبة Choices.js
import Choices from "choices.js";
import "choices.js/public/assets/styles/choices.min.css"

// DOM Elements
const countrySelect = document.getElementById("country");
const citySelect = document.getElementById("city");

// Create country options
const countryChoices = new Choices(countrySelect, {
  allowHTML: true, // Allow HTML to be displayed inside options
  callbackOnCreateTemplates: function () {
    return {
      item: (classNames, data) => {
        // Check for flag
        const flagIcon = data.customProperties?.flag
          ? `<img class="flag-icon" src="flags/${data.customProperties.flag}.png" alt="${data.label}" />`
          : ' '; // Make it empty if the image is not present

        // Create the element
        const container = document.createElement('div');
        container.className = `${classNames.item} ${data.highlighted ? classNames.highlightedState : ''}`;
        container.setAttribute('data-item', '');
        container.setAttribute('data-id', data.id);
        container.setAttribute('data-value', data.value);

        // Add content
        container.innerHTML = `${flagIcon} ${data.label}`;
        return container;
      },
      choice: (classNames, data) => {
        const flagIcon = data.customProperties?.flag
          ? `<img class="flag-icon" src="flags/${data.customProperties.flag}.png" alt="${data.label}" />`
          : '';

        const container = document.createElement('div');
        container.className = `${classNames.item} ${classNames.itemChoice}`;
        container.setAttribute('data-choice', '');
        container.setAttribute('data-id', data.id);
        container.setAttribute('data-value', data.value);
        container.setAttribute('role', data.groupId > 0 ? 'treeitem' : 'option');
        container.innerHTML = `${flagIcon} ${data.label}`;
        return container;
      },
    };
  },
});

// Fill in country options
Object.entries(countryCityData).forEach(([code, { name, flag }]) => {
  countryChoices.setChoices([
    {
      value: code,
      label: name,
      customProperties: { flag }, // Make sure flag exists
    },
  ]);
});

// Variable to store the city's Choices object
let cityChoices = new Choices(citySelect, {
  allowHTML: true,
});

// Handling country selection
countrySelect.addEventListener("change", () => {
  const selectedCode = countrySelect.value;
  const cities = countryCityData[selectedCode]?.cities || [];

  // Update city options
  citySelect.innerHTML = "";
  cities.forEach((city) => {
    const option = document.createElement("option");
    option.value = city;
    option.textContent = city;
    citySelect.appendChild(option);
  });

  // Destroy Previous initialization and reinitialization
  if (cityChoices) {
    cityChoices.destroy(); // Destroy current initialization
  }
  cityChoices = new Choices(citySelect, { allowHTML: true }); // Reinitialization
  citySelect.disabled = cities.length === 0; // Disable the list if there are no cities
});
5. تشغيل المشروع
بعد كتابة الكود، قم بتشغيل المشروع باستخدام الأمر:
npm run dev
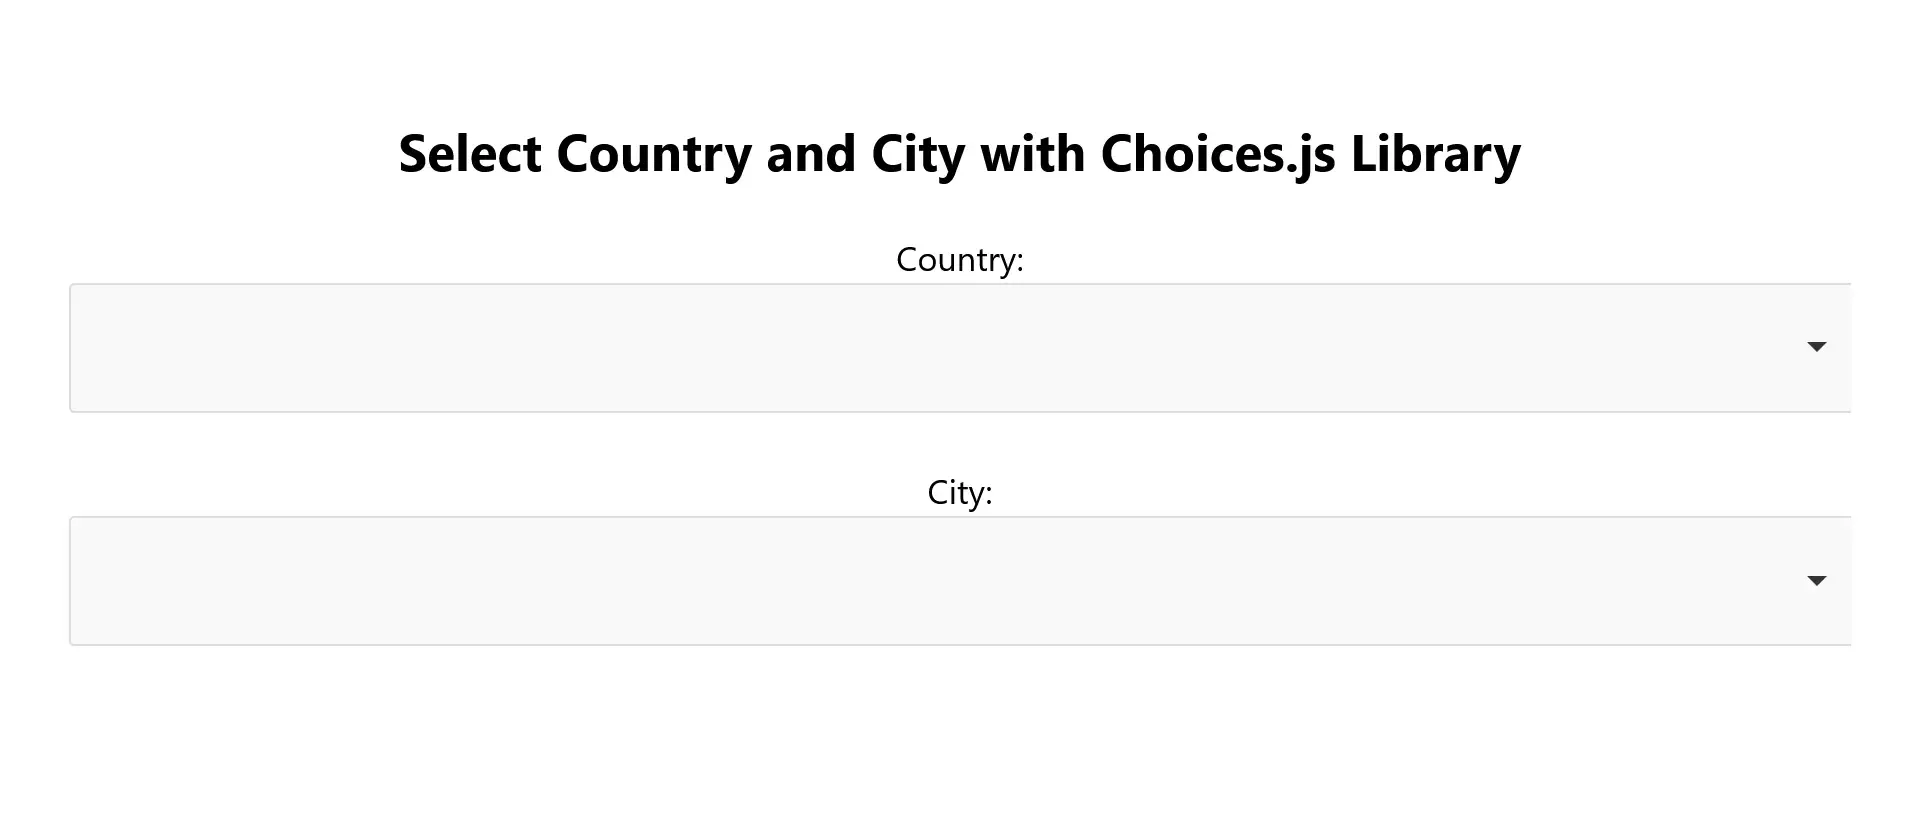
- سترى الواجهة تظهر في المتصفح مع قوائم اختيار ديناميكية.
- سيتم تشغيل المشروع في المتصفح على الرابط المحلي الذي يوفره Vite.
- قم بفتح الرابط التالى
http://localhost:5173/فى المتصفح وستجد التالى.
المميزات في هذه الطريقة
- مكتبة جاهزة: استخدام مكتبة
Choices.jsيوفر ميزات متقدمة مثل البحث داخل القوائم. - مرونة في التصميم: يمكن تخصيص التصميم بسهولة باستخدام CSS.
- ديناميكية البيانات: يمكن استبدال البيانات المحلية بواجهة برمجية (API) لتحديث الدول والمدن في الوقت الفعلي.
بالطبع! يمكننا إنشاء المشروع باستخدام طريقة أخرى تعتمد على مكتبة Select2، وهي مكتبة جافاسكريبت مرنة وسهلة الاستخدام لتخصيص قوائم الاختيار، مع دعم الميزات المتقدمة مثل البحث وإظهار صور الأعلام داخل القائمة.
إنشاء مشروع اختيار الدولة والمدينة باستخدام Vite وSelect2
في هذه الطريقة، سنستخدم مكتبة Select2 لتصميم قائمة اختيار الدول والمدن مع إضافة الأعلام بجانب أسماء الدول.
المتطلبات الأساسية
- Node.js مثبت على جهازك.
- معرفة أساسية بـ HTML وCSS وJavaScript.
1. إعداد مشروع Vite
ابدأ بإنشاء مشروع جديد باستخدام Vite:
npm create vite@latest vite-select2-country-city --template vanilla
cd vite-select2-country-city
npm install
قم بتثبيت مكتبة Select2 ومكتبة jQuery:
npm install jquery select2
2. تعديل هيكل HTML
قم بتحديث ملف index.html ليشمل الحقول المطلوبة:
<!DOCTYPE html>
<html lang="en">
<head>
  <meta charset="UTF-8">
  <meta name="viewport" content="width=device-width, initial-scale=1.0">
  <title>Select Country and City</title>
  <link rel="stylesheet" href="/src/style.css">
</head>
<body>
  <div id="app">
    <h2>Select Country and City with Select2 Library</h2>

    <label for="country">Country:</label>
    <select id="country" style="width: 100%"></select>

    <label for="city">City:</label>
    <select id="city" style="width: 100%;"></select>
  </div>

  <script type="module" src="/src/main.js"></script>
</body>
</html>
3. أكواد CSS الخاصة بالصفحة
في الخطوة التالية، سنقوم بتعديل ملف style.css في مجلد src الخاص بالمشروع. هذا الملف يحتوي على الكود اللازم لوضع بعض اللمسات الجمالية فى الصفحة.
:root {
  font-family: Inter, system-ui, Avenir, Helvetica, Arial, sans-serif;
  line-height: 1.5;
  font-weight: 400;

  font-synthesis: none;
  text-rendering: optimizeLegibility;
  -webkit-font-smoothing: antialiased;
  -moz-osx-font-smoothing: grayscale;
}

body {
  margin: 0;
  min-width: 320px;
  min-height: 100vh;
  text-align: center;
}

#app {
  max-width: 1280px;
  margin: 0 auto;
  padding: 2rem;
}

.flag-icon {
  width: 20px;
  height: 15px;
  margin-right: 10px;
  vertical-align: middle;
}
4. كتابة الكود البرمجي
قم بإضافة الكود التالي في ملف main.js:
تعريف بيانات الدول والمدن
// Country and city data
const countryCityData = {
  EG: { name: "Egypt", flag: "eg", cities: ["Cairo", "Giza", "Alexandria"] },
  US: { name: "United States", flag: "us", cities: ["New York", "Los Angeles", "Chicago"] },
  IN: { name: "India", flag: "in", cities: ["Delhi", "Mumbai", "Bangalore"] },
  DE: { name: "Germany", flag: "de", cities: ["Berlin", "Munich", "Frankfurt"] },
};
تهيئة مكتبة Select2
import $ from "jquery";
import select2 from "select2";

import "select2/dist/css/select2.min.css"; // Import Select2's CSS
select2($); // Force Select2 to work with jQuery

$(document).ready(() => {
  // Fill Country List
  const countryOptions = Object.entries(countryCityData).map(([code, { name, flag }]) => ({
    id: code,
    text: `<img class="flag-icon" src="flags/${flag}.png" style="width: 20px; height: 15px; margin-right: 5px;" /> ${name}`,
  }));

  $("#country").select2({
    data: countryOptions,
    escapeMarkup: (markup) => markup, // to allow flag images to be displayed
    placeholder: "Select Country",
  });

  // Initialize the city list
  $("#city").select2({
    placeholder: "Select City",
    disabled: true, // initially disabled
  });

  // Handling country selection
  $("#country").on("change", function () {
    const selectedCode = $(this).val();
    const selectedCountry = countryCityData[selectedCode];

    // Update the list of cities
    if (selectedCountry) {
      const cityOptions = selectedCountry.cities.map((city) => ({ id: city, text: city }));
      $("#city").empty(); // Empty the previous options
      cityOptions.forEach((option) => {
        const newOption = new Option(option.text, option.id, false, false);
        $("#city").append(newOption);
      });
      $("#city").prop("disabled", false).trigger("change");
    } else {
      $("#city").empty().prop("disabled", true).trigger("change");
    }
  });
});
5. تشغيل المشروع
لتشغيل المشروع، استخدم الأمر:
npm run dev
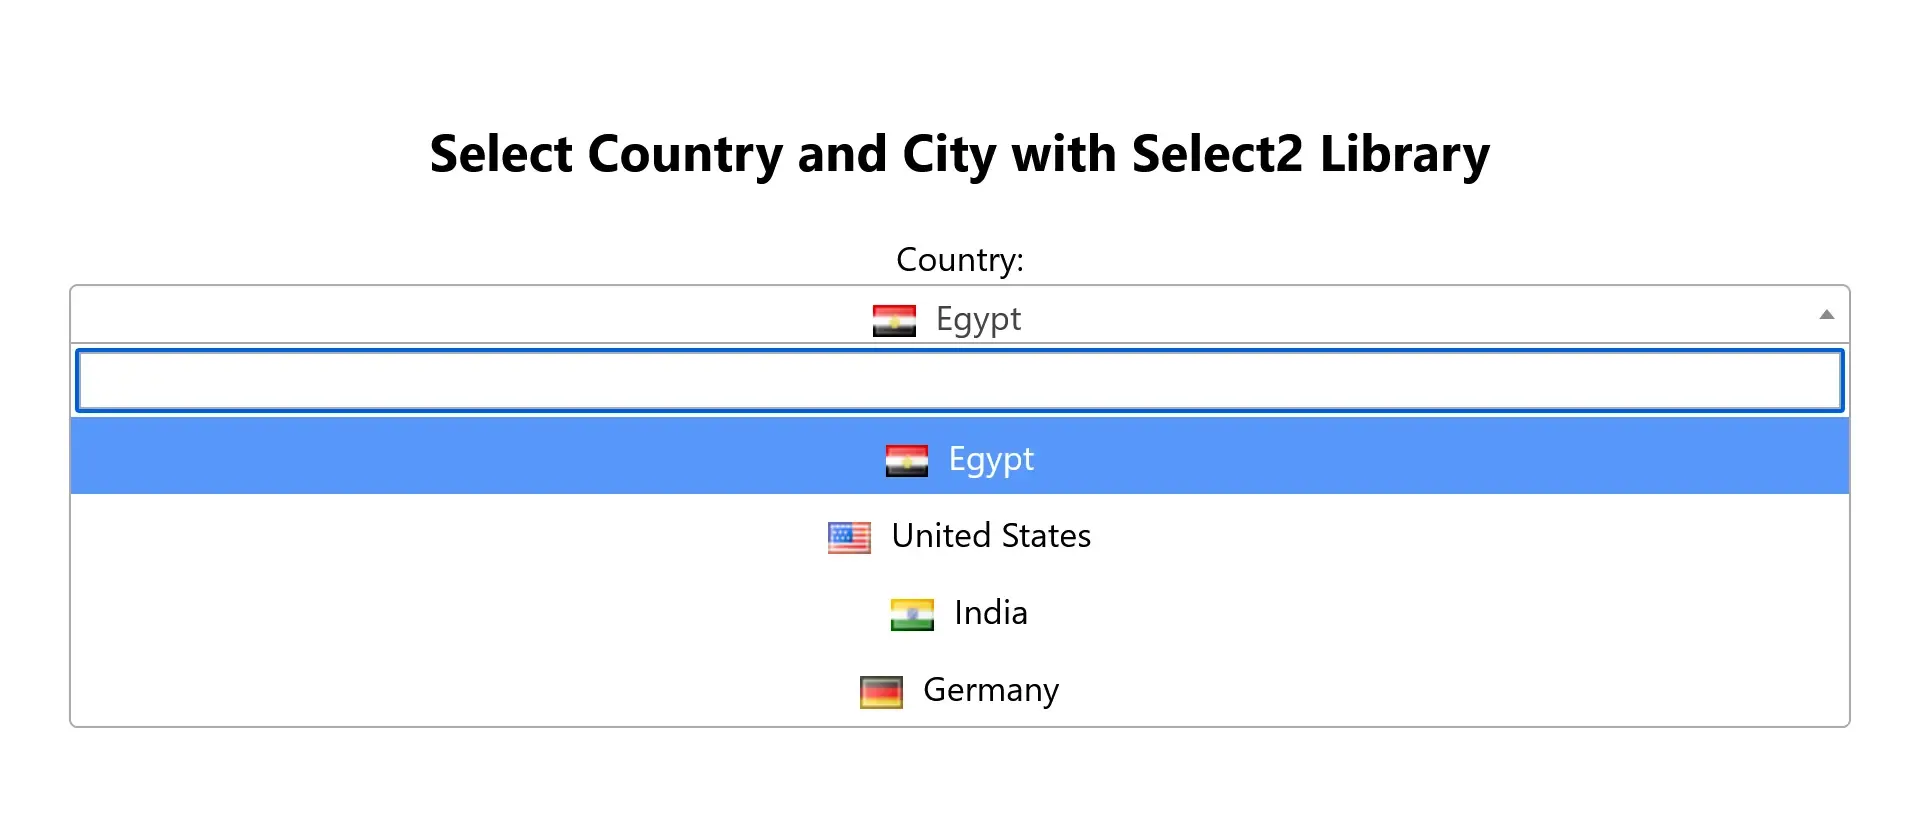
- ثم افتح المشروع في المتصفح. سترى واجهة احترافية تحتوي على قائمة الدول مع صور الأعلام بجانبها.
- سيتم تشغيل المشروع في المتصفح على الرابط المحلي الذي يوفره Vite.
- قم بفتح الرابط التالى
http://localhost:5173/فى المتصفح وستجد التالى.
المميزات باستخدام Select2
- دعم البحث: يمكن البحث داخل القوائم بسهولة.
- إظهار الصور: إمكانية إضافة صور الأعلام بجانب أسماء الدول.
- سهولة التخصيص: يمكن تخصيص المظهر باستخدام CSS.
- تكامل مع مكتبة jQuery: يجعل العمل مع DOM أكثر سهولة.
نعم، هناك طريقة أخرى تعتمد على إنشاء قائمة الدول والمدن باستخدام واجهة برمجة التطبيقات (API) مثل REST Countries للحصول على بيانات الدول والأعلام، ودمجها مع البيانات الديناميكية للمشروع. هذه الطريقة تجعل المشروع أكثر مرونة وقابلية للتحديث تلقائيًا بدون الحاجة لإدارة البيانات يدويًا.
إنشاء مشروع باستخدام REST API وSelect2
1. فكرة المشروع
- استخدام API للحصول على قائمة الدول والأعلام.
- إستخدام مكتبة Select2.
- عرض الأعلام بجانب أسماء الدول.
- عند اختيار دولة، يتم عرض قائمة المدن المرتبطة بها.
2. إعداد المشروع
قم بإنشاء مشروع Vite جديد:
npm create vite@latest vite-country-city-api --template vanilla
cd vite-country-city-api
npm install
قم بتثبيت مكتبة Select2 ومكتبة jQuery:
npm install jquery select2
3. تعديل ملف index.html
أضف الحقول المطلوبة للتفاعل:
<!DOCTYPE html>
<html lang="en">
  <head>
    <meta charset="UTF-8" />
    <meta name="viewport" content="width=device-width, initial-scale=1.0" />
    <title>Select Country and City</title>
    <link rel="stylesheet" href="/src/style.css" />
  </head>
  <body>
    <div id="app">
      <h2>Select Country and City with REST API and Select2</h2>
      <label for="country">Country:</label>
      <select id="country">
        <option value="" disabled selected>Select Country</option>
      </select>

      <label for="city">City:</label>
      <select id="city" disabled>
        <option value="" disabled selected>Select City</option>
      </select>
    </div>

    <script type="module" src="/src/main.js"></script>
  </body>
</html>
4. أكواد CSS الخاصة بالصفحة
في الخطوة التالية، سنقوم بتعديل ملف style.css في مجلد src الخاص بالمشروع. هذا الملف يحتوي على الكود اللازم لوضع بعض اللمسات الجمالية فى الصفحة.
:root {
  font-family: Inter, system-ui, Avenir, Helvetica, Arial, sans-serif;
  line-height: 1.5;
  font-weight: 400;

  font-synthesis: none;
  text-rendering: optimizeLegibility;
  -webkit-font-smoothing: antialiased;
  -moz-osx-font-smoothing: grayscale;
}

body {
  margin: 0;
  min-width: 320px;
  min-height: 100vh;
  text-align: center;
}

#app {
  max-width: 1280px;
  margin: 0 auto;
  padding: 2rem;
}

.flag-icon {
  width: 20px;
  height: 15px;
  margin-right: 10px;
  vertical-align: middle;
}

select {
  width: 100%;
  padding: 10px;
  margin: 10px 0;
}
5. كتابة الكود البرمجي في main.js
الحصول على بيانات الدول من API
import $ from "jquery";
import select2 from "select2";
import "select2/dist/css/select2.min.css"; // Import Select2's CSS

select2($); // Force Select2 to work with jQuery

const countrySelect = document.getElementById("country");
const citySelect = document.getElementById("city");

// Cities data (optional)
const countryCityData = {
  EG: { name: "Egypt", flag: "eg", cities: ["Cairo", "Giza", "Alexandria"] },
  US: { name: "United States", flag: "us", cities: ["New York", "Los Angeles", "Chicago"] },
  IN: { name: "India", flag: "in", cities: ["Delhi", "Mumbai", "Bangalore"] },
  DE: { name: "Germany", flag: "de", cities: ["Berlin", "Munich", "Frankfurt"] },
};

// Load countries from API
async function loadCountries() {
  const response = await fetch("https://restcountries.com/v3.1/all");
  const countries = await response.json();

  const countryOptions = countries.map((country) => {
    const flag = country.flags.svg || country.flags.png; // Flag link

    const name = country.translations.ar?.common || country.name.common; // Country name
    return {
      id: country.cca2, // Country code
      text: `<img class="flag-icon" src="${flag}" style= "width: 20px; height: 15px; margin-right: 5px;" /> ${name}`,
    };
  });

  // Initialize Select2 with countries
  $("#country").select2({
    data: countryOptions,
    escapeMarkup: (markup) => markup, // Allow flags to be displayed as HTML
    placeholder: "Select Country",
  });
}

// When selecting the country
$("#country").on("change", function () {
  const selectedCode = $(this).val();
  const selectedCountry = countryCityData[selectedCode];

  // Update the list of cities
  if (selectedCountry) {
    const cityOptions = selectedCountry.cities.map((city) => ({
      id: city,
      text: city,
    }));

    $("#city").empty(); // Empty old options
    cityOptions.forEach((option) => {
      const newOption = new Option(option.text, option.id, false, false);
      $("#city").append(newOption);
    });

    $("#city").prop("disabled", false).trigger("change");
  } else {
    $("#city").empty().prop("disabled", true).trigger("change");
  }
});

// Initialize the list of cities
$("#city").select2({
  placeholder: "Select City",
  disabled: true, // initially disabled
});

// Call function to load countries from API
$(document).ready(() => {
  loadCountries();
});
6. تشغيل المشروع
لتشغيل المشروع، استخدم الأمر:
npm run dev
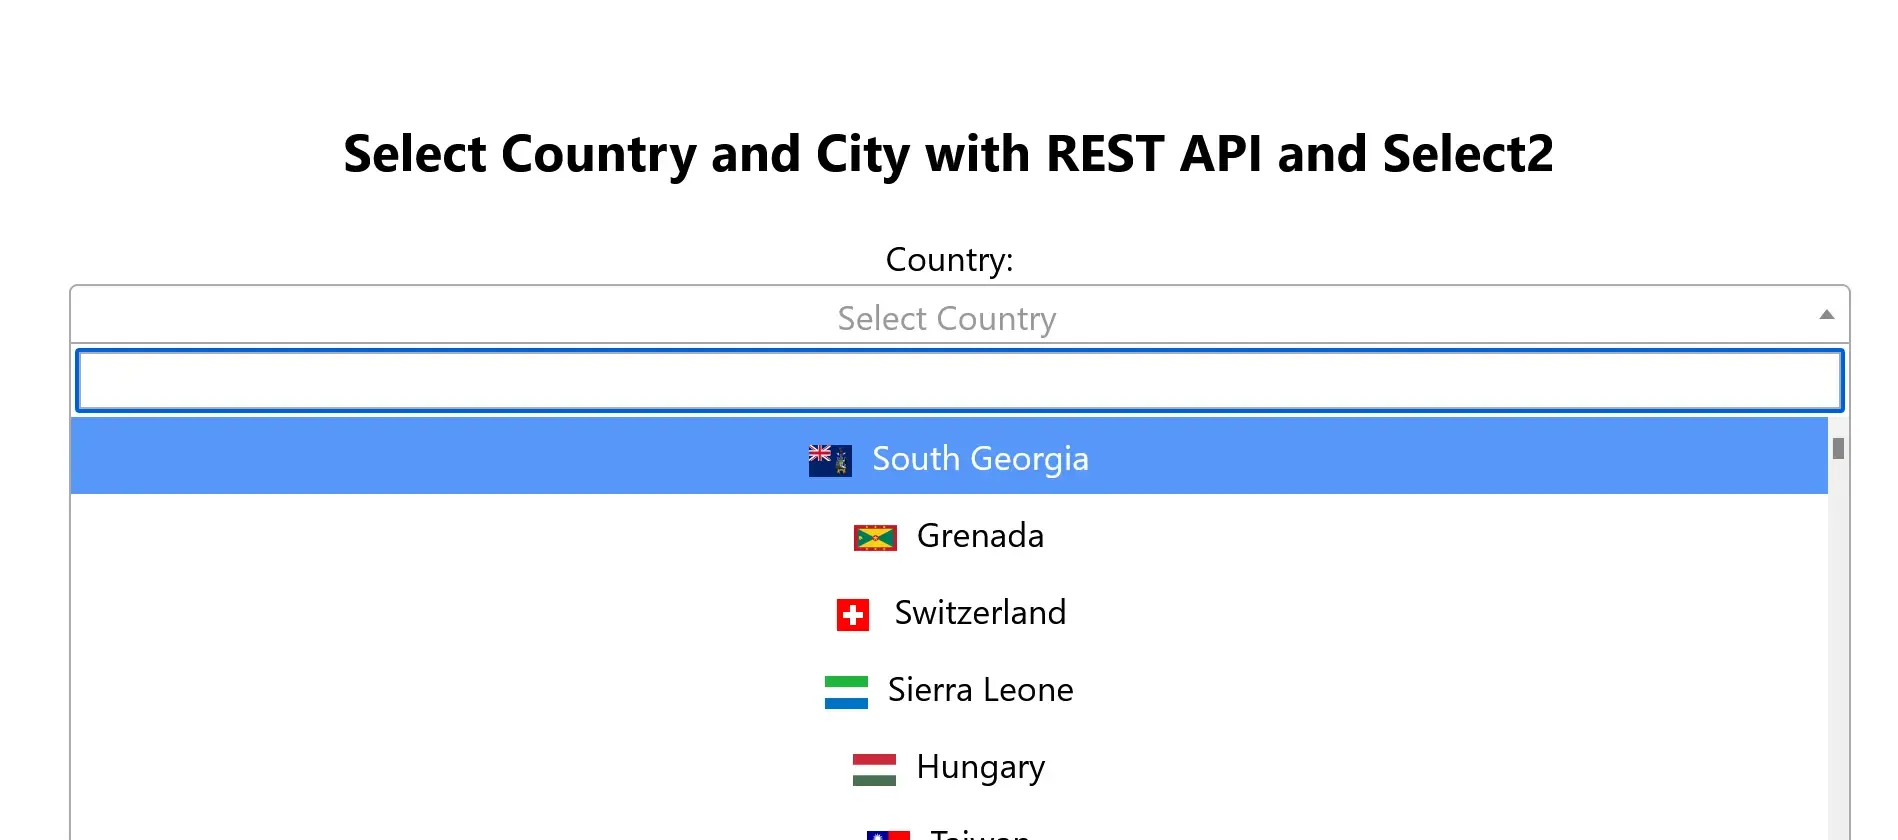
- ثم افتح المشروع في المتصفح. سترى واجهة احترافية تحتوي على قائمة الدول مع صور الأعلام بجانبها.
- سيتم تشغيل المشروع في المتصفح على الرابط المحلي الذي يوفره Vite.
- قم بفتح الرابط التالى
http://localhost:5173/فى المتصفح وستجد التالى.
مميزات هذه الطريقة
- دعم البيانات الديناميكية:
- يتم تحميل بيانات الدول مباشرة من REST API.
- يتم تحديث المشروع تلقائيًا إذا تغيرت البيانات في API.
- سهولة إضافة المدن:
- يمكن تخزين بيانات المدن محليًا أو استخدام API إضافية.
- المميزات باستخدام Select2
- دعم البحث: يمكن البحث داخل القوائم بسهولة.
- إظهار الصور: إمكانية إضافة صور الأعلام بجانب أسماء الدول.
- سهولة التخصيص: يمكن تخصيص المظهر باستخدام CSS.
- تكامل مع مكتبة jQuery: يجعل العمل مع DOM أكثر سهولة.
إنشاء قائمة دول ومدن ديناميكية باستخدام مكتبة Select2 وملف JSON محلي
في هذا المثال، سنتناول كيفية استخدام مكتبة Select2 لإنشاء قائمة منسدلة ديناميكية لعرض الدول والمدن. سنستخدم ملف JSON محلي يحتوي على جميع الدول والمدن، وسنشرح كيفية استيراد البيانات وربطها بالقوائم المنسدلة.
الخطوة الأولى: إعداد المشروع
1. تثبيت مكتبة Select2:
تأكد من تثبيت مكتبة Select2 وjQuery باستخدام npm:
npm install jquery select2
2. إعداد ملف JSON:
تأكد من أن لديك ملفًا يحتوي على بيانات الدول والمدن. لنفترض أن الملف يسمى countries.js ويتبع التنسيق التالي:
export default [
  {
    countryName: "Afghanistan",
    countryShortCode: "AF",
    regions: [
      { name: "Badakhshan", shortCode: "BDS" },
      { name: "Kabul", shortCode: "KBL" },
    ],
  },
  {
    countryName: "India",
    countryShortCode: "IN",
    regions: [
      { name: "Delhi", shortCode: "DL" },
      { name: "Mumbai", shortCode: "MH" },
    ],
  },
];
الخطوة الثانية: هيكلة HTML
أنشئ هيكلًا بسيطًا يحتوي على قائمتين منسدلتين:
<!DOCTYPE html>
<html lang="en">
  <head>
    <meta charset="UTF-8" />
    <meta name="viewport" content="width=device-width, initial-scale=1.0" />
    <title>Select Country and City</title>
    <link rel="stylesheet" href="/src/style.css" />
  </head>
  <body>
    <div id="app">
      <h1>Select Country and City</h1>
      <div>
        <label for="country">Select Country:</label>
        <select id="country" style="width: 100%"></select>
      </div>
      <div>
        <label for="city">Select City:</label>
        <select id="city" style="width: 100%" disabled></select>
      </div>
    </div>

    <script type="module" src="/src/main.js"></script>
  </body>
</html>
الخطوة الثالثة: تحميل البيانات وتهيئة القوائم
1. استيراد المكتبات والبيانات:
قم باستيراد مكتبة Select2 وملف JSON:
import $ from "jquery";
import select2 from "select2";
import "select2/dist/css/select2.min.css";
import countries from "./countries.js";

select2($)
2. تهيئة القائمة المنسدلة للدول:
- استخدم بيانات الدول لإنشاء خيارات للقائمة المنسدلة:
function populateCountries() {
  const countryOptions = countries.map((country) => ({
    id: country.countryShortCode,
    text: `
        <span class="flag-container">
          <img class="flag-icon" src="flags/${country.countryShortCode.toLowerCase()}.png" alt="${country.countryName}" />
        </span>
        ${country.countryName}
      `,
  }));

  $("#country").select2({
    data: countryOptions,
    escapeMarkup: (markup) => markup, // للسماح بعرض الأعلام
    placeholder: "اختر الدولة",
  });
}
3. ربط المدن بالدولة المختارة:
- عند اختيار دولة، يتم تحديث قائمة المدن:
$("#country").on("change", function () {
  const selectedCode = $(this).val();
  const selectedCountry = countries.find(
    (country) => country.countryShortCode === selectedCode
  );

  if (selectedCountry && selectedCountry.regions) {
    const cityOptions = selectedCountry.regions.map((region) => ({
      id: region.shortCode,
      text: region.name,
    }));

    $("#city")
      .prop("disabled", false)
      .empty()
      .select2({
        data: cityOptions,
        placeholder: "Select City",
      });
  } else {
    $("#city").prop("disabled", true).empty().select2({ data: [] });
  }
});
4. تهيئة قائمة المدن عند بداية الصفحة:
- قم بتعطيل قائمة المدن افتراضيًا:
$("#city").select2({
  placeholder: "Select City",
});
5. استدعاء تهيئة الدول:
- قم باستدعاء الدالة عند تحميل الصفحة:
$(document).ready(() => {
  populateCountries();
});
الخطوة الرابعة: تنسيق القوائم
أضف بعض التنسيقات لجعل القوائم أكثر جمالًا:
:root {
  font-family: Inter, system-ui, Avenir, Helvetica, Arial, sans-serif;
  line-height: 1.5;
  font-weight: 400;

  font-synthesis: none;
  text-rendering: optimizeLegibility;
  -webkit-font-smoothing: antialiased;
  -moz-osx-font-smoothing: grayscale;
}

body {
  margin: 0;
  min-width: 320px;
  min-height: 100vh;
  text-align: center;
}

h1 {
  font-size: 3.2em;
  line-height: 1.1;
}

#app {
  max-width: 1280px;
  margin: 0 auto;
  padding: 2rem;
}

.flag-icon {
  width: 20px;
  height: 15px;
  margin-right: 10px;
  vertical-align: middle;
}

select {
  width: 100%;
}
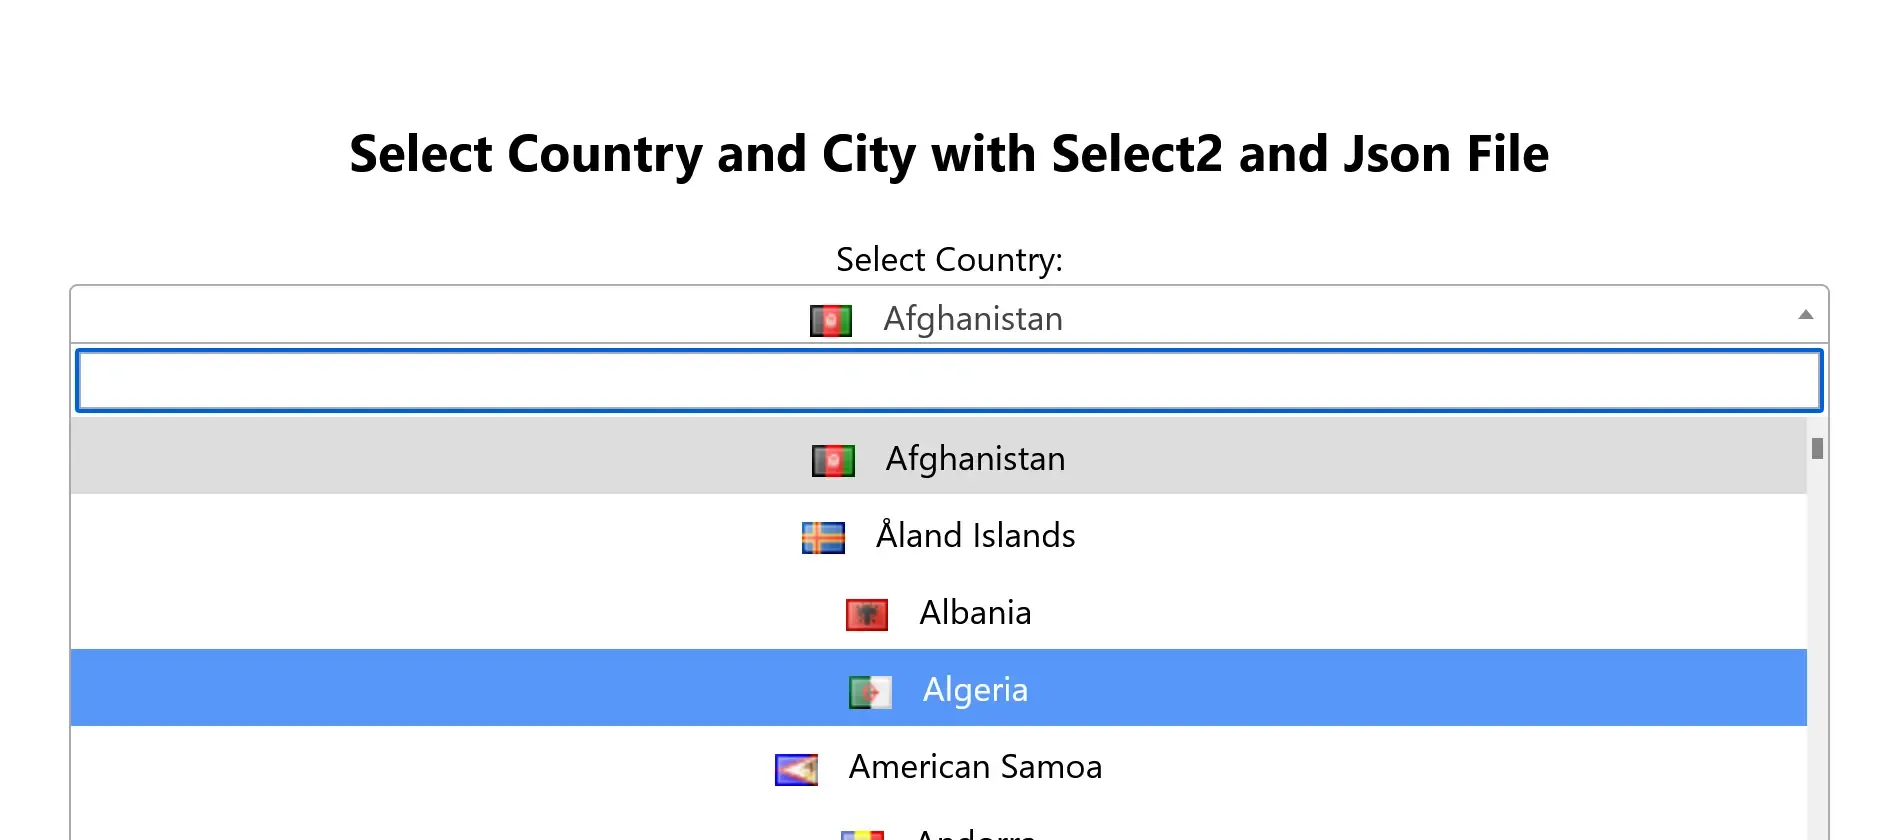
نتيجة المشروع
- عند تحميل الصفحة، يتم عرض جميع الدول في القائمة المنسدلة الأولى.
- عند اختيار دولة، يتم ملء القائمة الثانية بالمدن الخاصة بتلك الدولة.
- يتم تعطيل قائمة المدن إذا لم يتم اختيار أي دولة.
خاتمة:
اختيار الطريقة المناسبة لإنشاء مشروع اختيار الدولة والمدينة يعتمد على متطلباتك التقنية واحتياجات مشروعك. سواء كنت تفضل البساطة بعدم استخدام مكتبات خارجية، أو ترغب في الاستفادة من مميزات أدوات مثل Select2 وChoices.js، فإن الخيارات متعددة. جرب الطرق المختلفة واختر الأفضل لمشروعك لضمان تجربة مستخدم سلسة ومميزة.
يمكنك العثور على جميع الأمثلة جاهزة ومرفوعة على مستودع GitHub.
